There’s are plenty of great apps on the Quest Store, but did you know you can download games, experiences, and useful tools from an entirely different library? With SideQuest, you can expand your horizons with unofficial mods, tools, and indie gems of all sorts, both paid and free. Find out how (and why) with this handy dandy guide.
SideQuest has an awesome library of content, including cool multiplayer games, mods for games you already own on Quest such as Beat Saber, and tools that can let you do things Meta doesn’t always allow.
That’s what ‘sideloading’ is for: letting you install any app you want and mod it without oversight. That level of functional exclusivity has changed somewhat with the entrance of App Lab, although SideQuest is still the fastest way of getting new apps. We’ve heard reports of developers waiting up to six weeks to get their apps approved for App Lab.
What you’ll need:
- Quest or Quest 2
- A computer or modern Android device – Computers include: Windows 8 or above PC, Linux PCs, macOS
- USB Type-C cable to transfer apps from computer /Android device to Quest
- A few minutes to jump through some hoops
1: Install SideQuest on Your Computer or Android Device
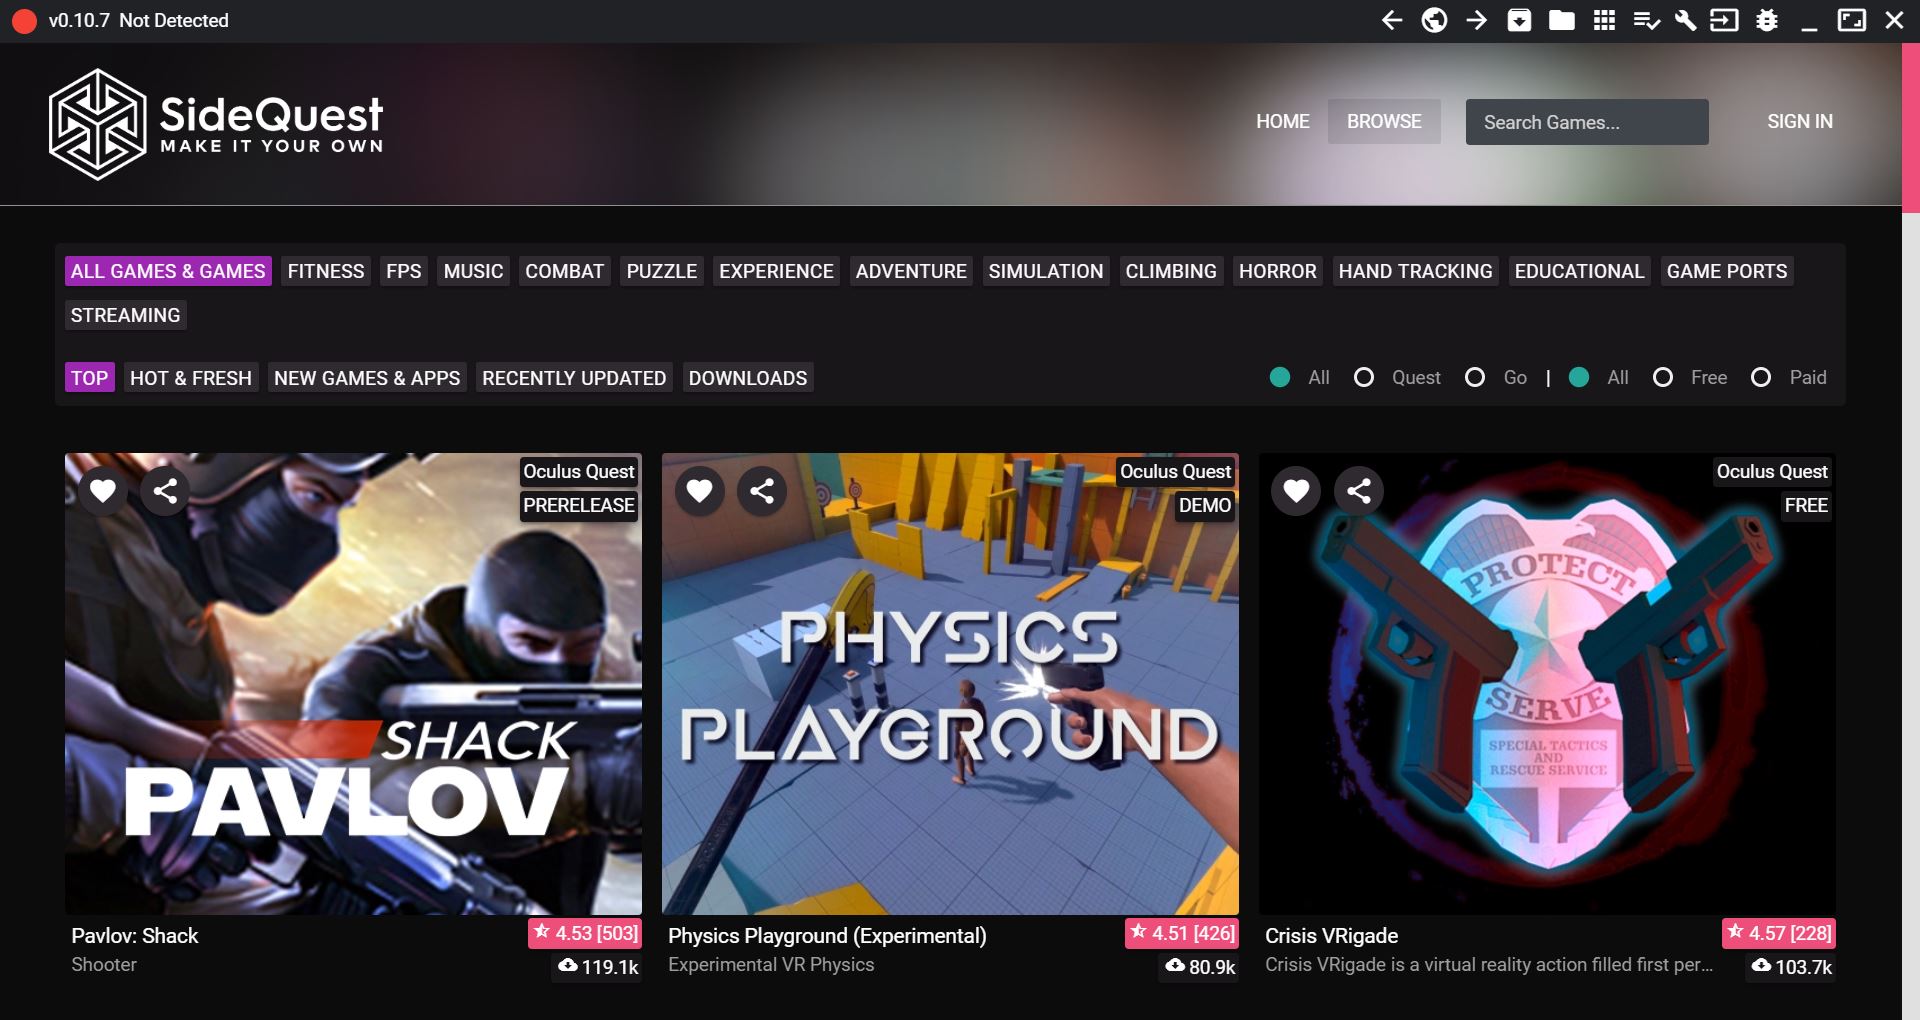
Computer: You’ll find all of the latest builds on SideQuest’s website, including those for Windows 8 and up PCs, Linux, and macOS. Once installed, you can technically launch it and peruse all of the apps, although you’ll need to do a few minor chores first before SideQuest will properly recognize your headset, so don’t plug it in just yet. There’s also now a new in-VR sideloading function which lets you download games from SideQuest directly when inside VR.
Android: Download the SideQuest Android app on Google Play Store. Don’t plug in your cable just yet.
2: Put on Your Dev Hat
Get under the hood of Quest as a developer. You only need to jump through a single hoop here to get you officially recognized as such.
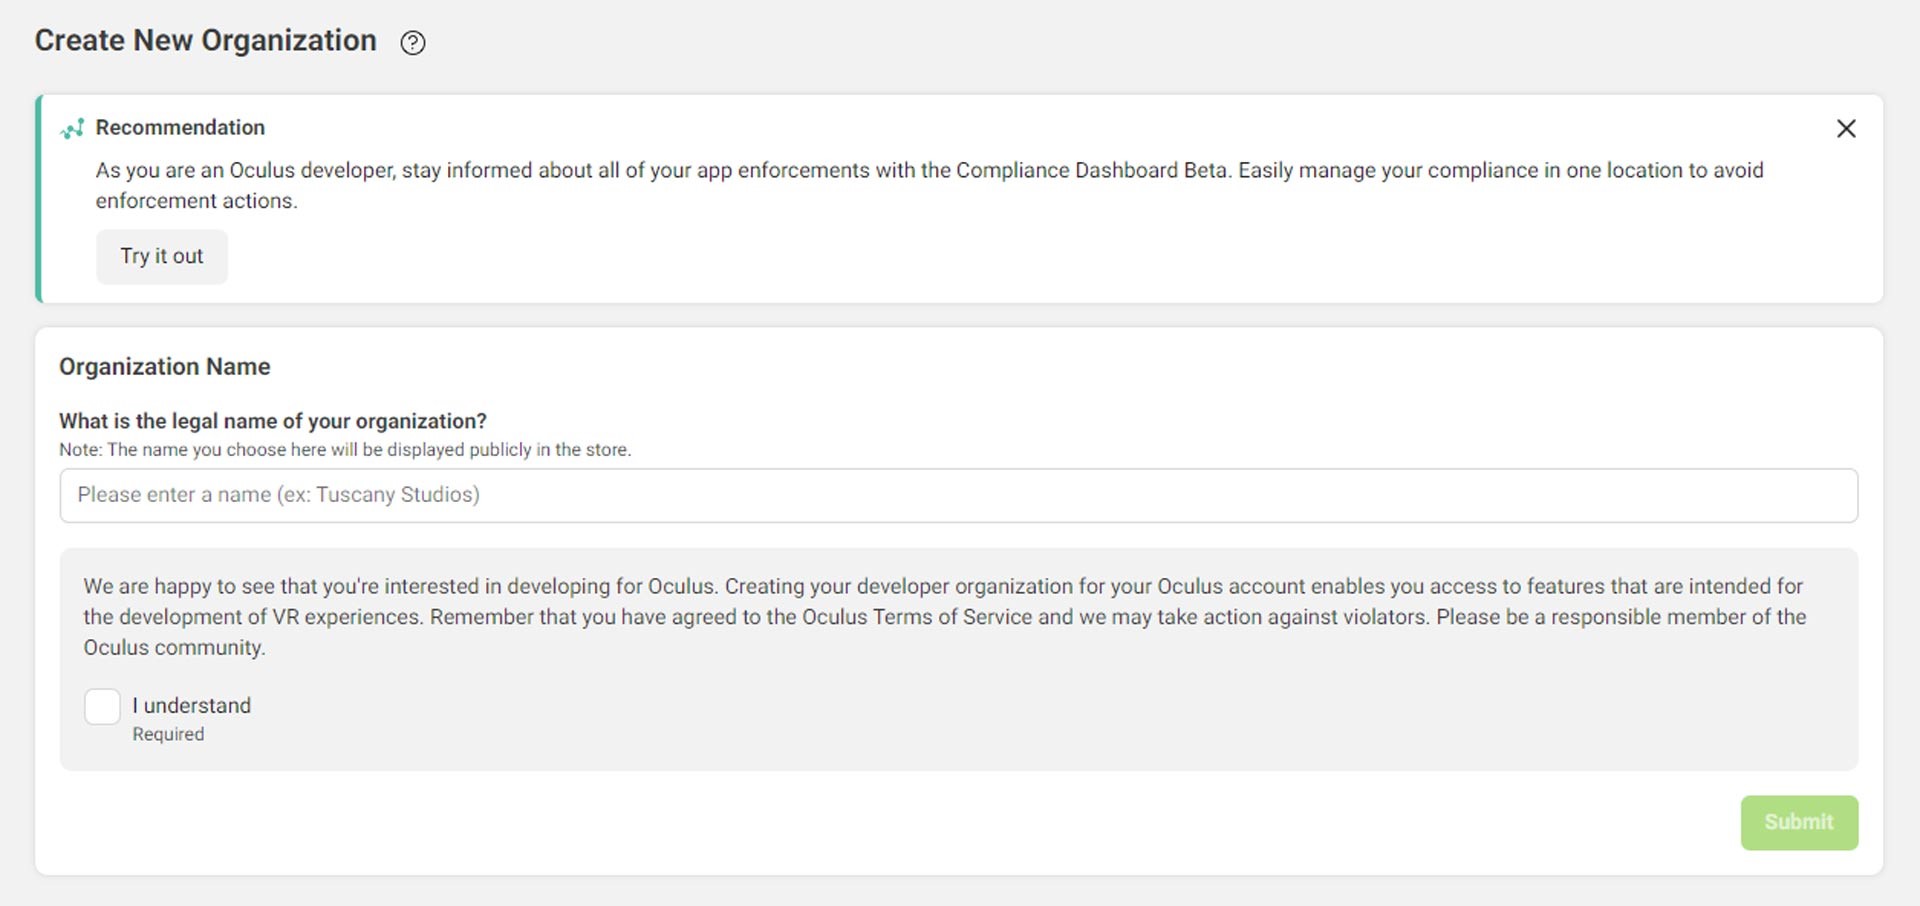
Just head over to the Developer Organization dashboard, login to your Oculus account, and create what Meta considers an “organization.” Toss a random name in there (if you truly aren’t a developer) and agree to the terms of service. You may also need to verify your account using either a credit card or a phone number if it’s not already verified.

Computer: If you’re a Windows user, you’ll also need some extra driver software before going any further. Both mac and Linux users can skip to step three. If you’re a Windows user, download these Oculus Go drivers, which also work for Quest. Simply extract the zip folder by right clicking the android_winusb.inf file and clicking ‘Install’.
3: Enable Developer Mode and Reboot
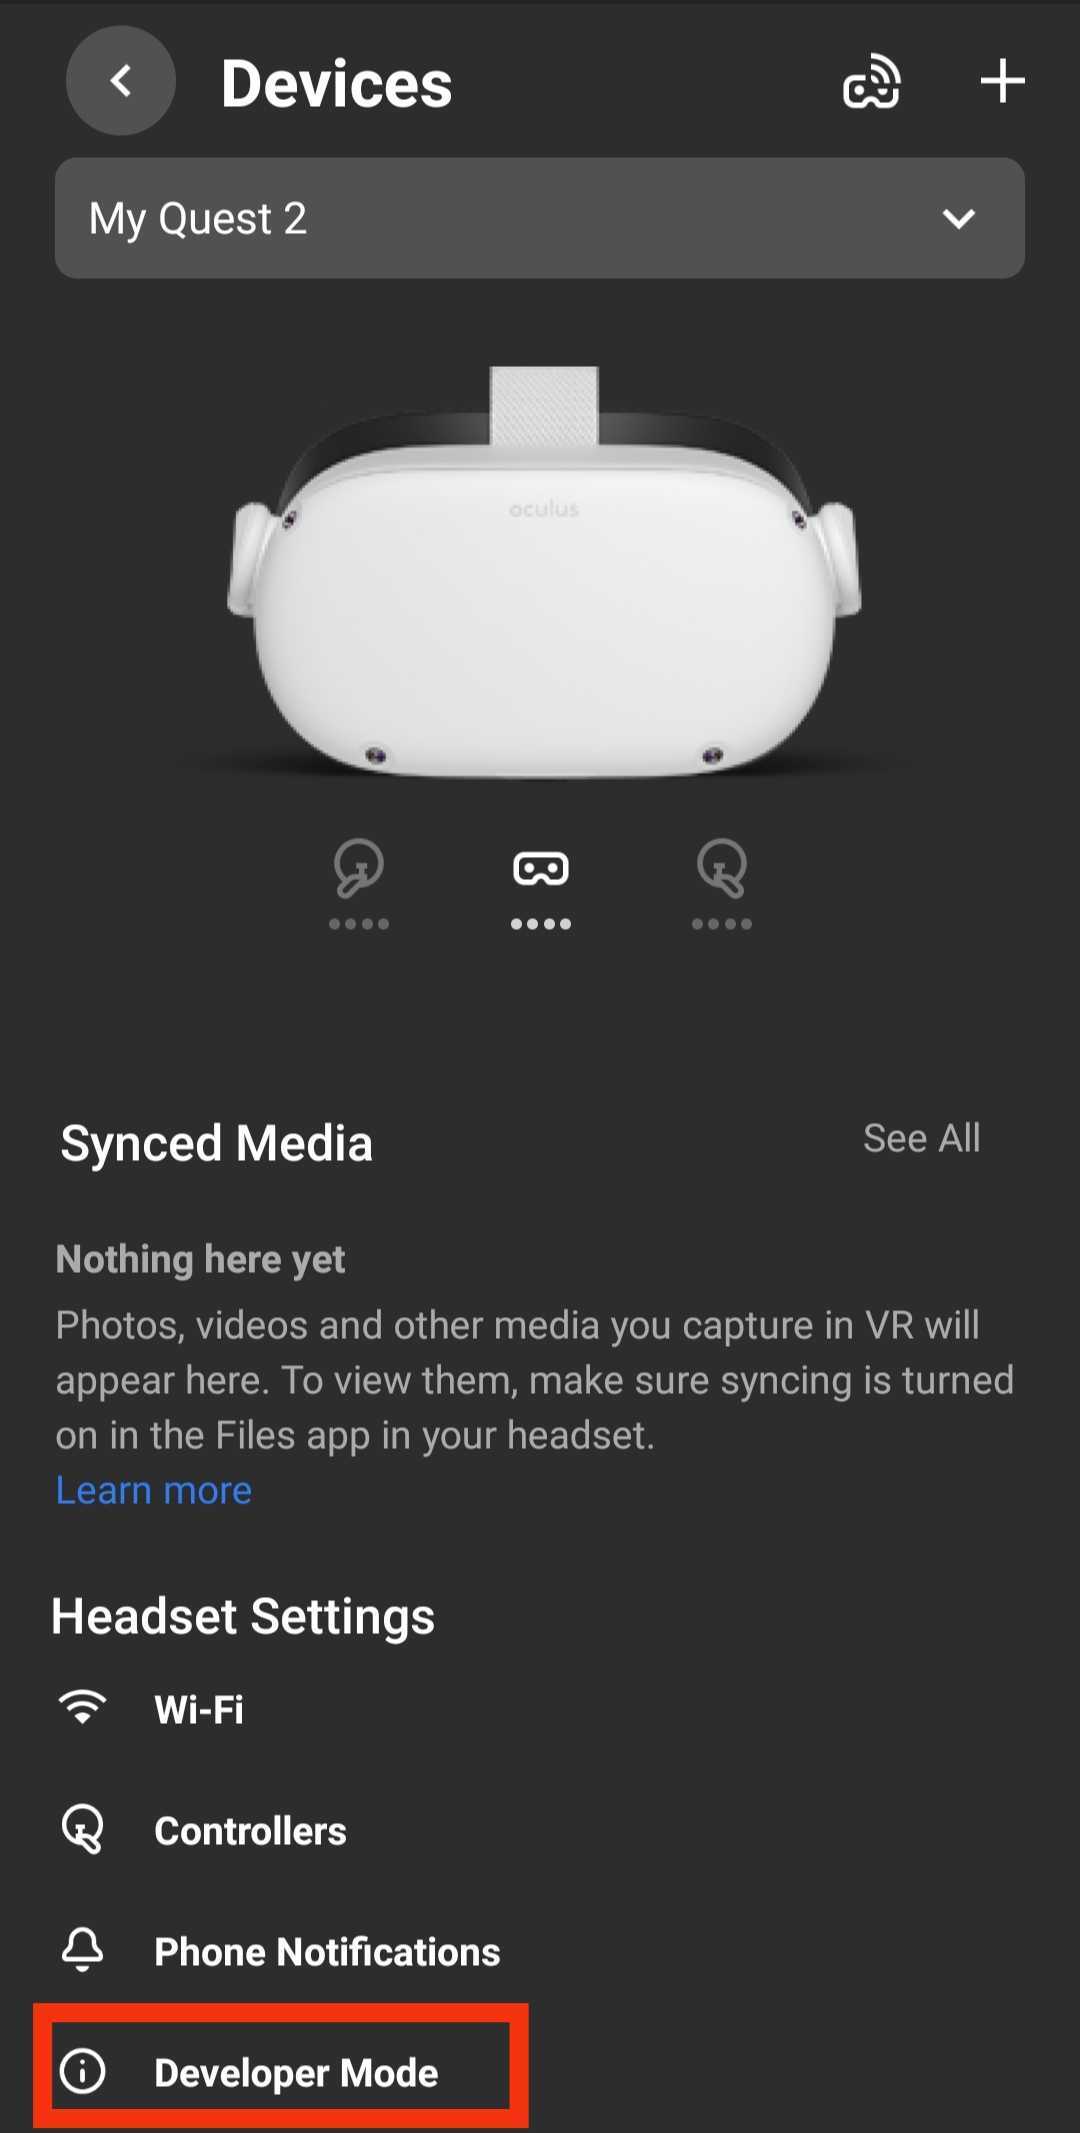
As a Quest user, you should already have the Oculus app installed on your mobile device. Turn on your Quest if it isn’t already, open the Oculus app on you phone, go to ‘Menu’ section on the bottom right hand side, go to ‘Settings’.

Make sure your headset is marked as ‘Connected’ within the app, head into ‘Developer Mode’, then simply toggle it on. Reboot your Quest now.
4: Connect Quest to Your Device via USB & Allow USB Debugging
You’re at the home stretch! Plug your freshly rebooted Quest into your computer/Android device using a USB Type-C cable.
Android: This can be tricky for users on older Android devices since micro USB to USB Type-C is fairly rare. We’d suggest using a modern Android device fitted with a Type-C port.
Now physically put on your headset, and you should see a window (in VR) that says ‘Allow USB debugging?’ at which point you simply click the check box ‘Always allow from this computer’.
The team behind SideQuest points out that it’s important to Disable Unlock Pattern too. You can do this by going back to the Oculus mobile app and going through Settings > Quest > More Settings > Unlock Pattern. It’s right near the Developer Mode option you toggled before.
5: Sideload Everything
And there you have it! Now you can open the SideQuest app and browse a whole new universe of VR games, prototypes, demos, tools and more. Keep your Quest connected (shown as a green dot in upper left corner of the app), and you’ll be able to install and uninstall sideloaded apps to your heart’s content. This goes for both computer and Android devices.

Although, there’s one more trick for Android users. You can also wirelessly sideload apps via Wi-Fi.
To do that, you need to be already set up for transfer via cable connection. Go into the SideQuest app and pop in your local IP address. You can reveal your local IP address by clicking the Wi-Fi icon whilst in Quest’s home environment, selecting the network you’re currently connected to, and scrolling all the way down to reveal the string of numbers. These oftentimes beginning with ‘192’. Now you can sideload apps wirelessly from your phone to your Quest!
Oh, and if you’re still having trouble, check out this handy video guide from the good people at SideQuest:
Update (June 27th, 2023): Updated to include new in-headset sideloading mode.
,
